[!NOTE]
本篇内容需要在上一篇的基础上进行。
请找到上一篇的项目代码,本篇在上一篇的源代码上进行编写。
本系列教程目录:https://laisc7301.github.io/blog/2024/01/29/202401290001SpringBoot%E7%B3%BB%E5%88%97%E5%9F%BA%E7%A1%80%E6%95%99%E7%A8%8B/
接着上一篇继续来。
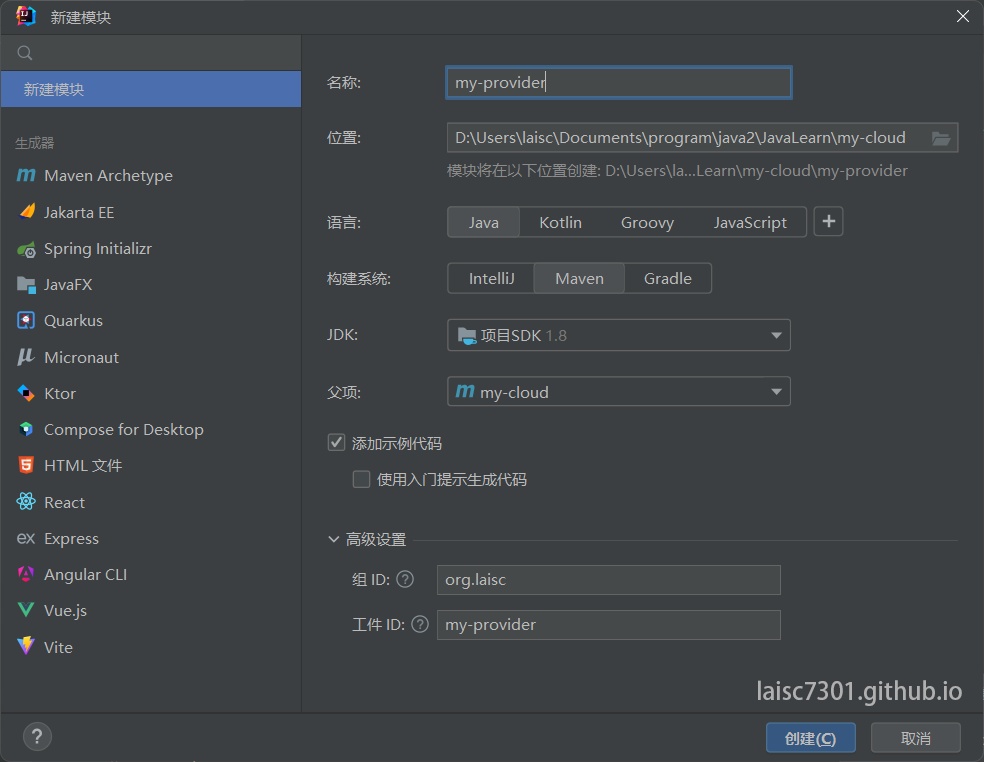
首先按照图示新建模块:
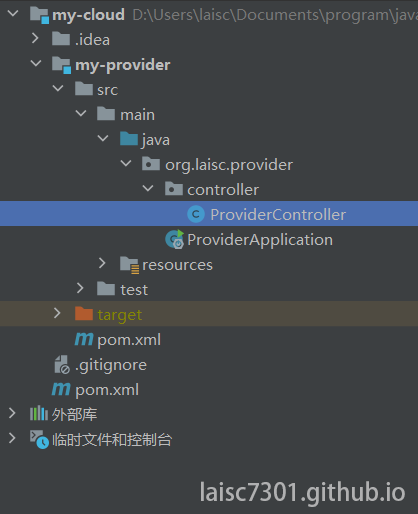
整个项目的文件结构如下图所示:
修改pom.xml文件:
1
2
3
4
5
6
7
8
9
10
11
12
13
14
15
16
17
18
19
20
21
22
23
24
25
26
27
28
29
30
31
32
33
34
35
36
37
38
39
40
41
42
43
44
45
46
47
48
49
50
51
52
53
54
55
56
57
58
59
60
61
62
63
64
| <?xml version="1.0" encoding="UTF-8"?>
<project xmlns="http://maven.apache.org/POM/4.0.0"
xmlns:xsi="http://www.w3.org/2001/XMLSchema-instance"
xsi:schemaLocation="http://maven.apache.org/POM/4.0.0 http://maven.apache.org/xsd/maven-4.0.0.xsd">
<parent>
<groupId>org.laisc</groupId>
<artifactId>my-cloud</artifactId>
<version>1.0-SNAPSHOT</version>
</parent>
<modelVersion>4.0.0</modelVersion>
<packaging>jar</packaging>
<artifactId>my-provider</artifactId>
<properties>
<java.version>1.8</java.version>
</properties>
<dependencies>
<dependency>
<groupId>org.springframework.boot</groupId>
<artifactId>spring-boot-starter-web</artifactId>
</dependency>
<dependency>
<groupId>org.springframework.boot</groupId>
<artifactId>spring-boot-starter-actuator</artifactId>
</dependency>
<dependency>
<groupId>org.springframework.boot</groupId>
<artifactId>spring-boot-starter-test</artifactId>
<scope>test</scope>
</dependency>
<dependency>
<groupId>com.alibaba.cloud</groupId>
<artifactId>spring-cloud-starter-alibaba-nacos-discovery</artifactId>
</dependency>
</dependencies>
<build>
<plugins>
<plugin>
<groupId>org.springframework.boot</groupId>
<artifactId>spring-boot-maven-plugin</artifactId>
<configuration>
<mainClass>com.moonce.provider.ProviderApplication</mainClass>
</configuration>
</plugin>
</plugins>
</build>
</project>
|
添加application.yml文件:
1
2
3
4
5
6
7
8
9
10
11
12
13
14
15
16
17
18
| spring:
application:
name: my-provider
cloud:
nacos:
discovery:
server-addr: 127.0.0.1:8848
config:
enabled: false
server:
port: 8081
management:
endpoints:
web:
exposure:
include: "*"
|
其它文件的源代码:
ProviderApplication.java
1
2
3
4
5
6
7
8
9
10
11
12
13
14
15
| package org.laisc.provider;
import org.springframework.boot.SpringApplication;
import org.springframework.boot.autoconfigure.SpringBootApplication;
import org.springframework.cloud.client.discovery.EnableDiscoveryClient;
@SpringBootApplication
@EnableDiscoveryClient
public class ProviderApplication {
public static void main(String[] args) {
SpringApplication.run(ProviderApplication.class, args);
System.out.println("ok!");
}
}
|
ProviderController.java
1
2
3
4
5
6
7
8
9
10
11
12
13
14
15
16
17
18
19
| package org.laisc.provider.controller;
import org.springframework.beans.factory.annotation.Value;
import org.springframework.web.bind.annotation.GetMapping;
import org.springframework.web.bind.annotation.PathVariable;
import org.springframework.web.bind.annotation.RestController;
@RestController
public class ProviderController {
@Value("${server.port}")
private String port;
@GetMapping(value = "/test/{message}")
public String test(@PathVariable String message) {
return "当前服务收到消息: " + message + ", 该服务由端口: " + port + "提供。";
}
}
|
启动Nacos,启动项目,访问 http://localhost:8081/test/hello ,
你将看到:
当前服务收到消息: hello, 该服务由端口: 8081提供。
访问 http://localhost:8848/nacos/index.html ,打开【服务管理】-【服务列表】
你将看到下面页面:

项目源代码下载:https://pan.baidu.com/s/19P6K4dLO1QwYCYI93Btmvg?pwd=3agh
上一篇:Spring Cloud Alibaba项目创建: https://laisc7301.github.io/blog/2024/01/27/202401270000SpringCloudAlibaba%E9%A1%B9%E7%9B%AE%E5%88%9B%E5%BB%BA/
下一篇:Spring Cloud Alibaba创建服务消费者:https://laisc7301.github.io/blog/2024/01/27/202401270002SpringCloudAlibaba%E5%88%9B%E5%BB%BA%E6%9C%8D%E5%8A%A1%E6%B6%88%E8%B4%B9%E8%80%85/